We are fortunate enough to have quite a large backyard, living in a single family home nestled on a fairly flat lot that is just over half an acre. Unfortunately, a big chunk of this backyard was rough and cracked asphalt that was once a tennis court (of some sort) in the 1950’s. The good side of this was that it was flat, a perfectly shaped rectangle and there was nothing on it except for broken asphalt. This made the actual site selection of the shed somewhat easy and it would only come down to setbacks.
All of this first started with a precursor idea of wanting to do a master bedroom addition to our house by converting our existing carport. However, I had a bunch of CrossFit-inspired workout equipment in there and used it almost daily to workout. Knowing a master bedroom addition would be a huge project, we thought “Oh, let’s build that shed we always thought of in the backyard and turn it into a gym! That way, we can workout during the construction” And from that point forward, we were stoked about building a gym.
The next question was, well — we have this huge broken asphalt area that stretches well beyond the footprint of the gym — we can’t just chisel out a spot for the gym and leave the rest of it broken asphalt. Thus came the next precursor step of kicking off a landscaping project. So, we got to work with demolition, layout planning, plant selection, etc. The landscaping side of this I’ll save for another blog post someday. Fast forward past that and we have our site ready to go.
Side note — as part of the landscaping project — contractors were eager to bid on building the shed. We had TuffShed in mind given it was somewhat fully customizable and, ultimately, it was going to be “just a gym”, but we still wanted to hear what contractors would say. It was ultimately the equivalent of building an ADU and the cost of build was big. We thought this was overkill, not to mention, totally out of the focus of the landscaping — so we turned those offers down and chose a contractor solely focused on landscaping. It paid off as it kept the cost low and focused.
We kicked off our conversation with TuffShed and began iterating through all of the different options. The online functionality was pretty cool and allowed us to play around with different windows and doors. We were pleased to discover that TuffShed roof shingle colors could match our current one. Our main home roof is “Burnt Sienna” shingles and TuffShed had a “Hickory” which was basically the same thing.
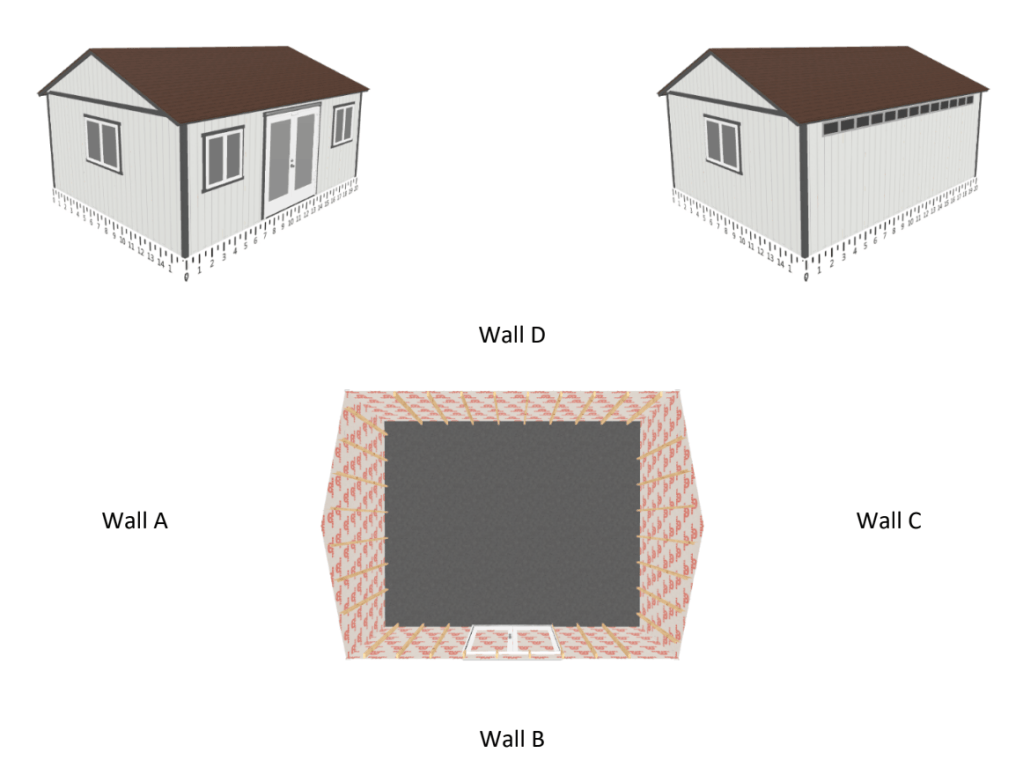
Here were our ultimate TuffShed build specs:
- Premier Pro Tall Ranch 16′ x 20′ (320 square feet)
- 6068 Tempered Full Lite Residential Door
- 4x insulated sliding windows
- 12x transom windows along the back wall
- Delicate White paint
- Knight’s Armor trim
- Hickory Dimensional Premium Shingles
- Full Permit and Engineering service
- Concrete Pad
All in all, the entire TuffShed cost, including the concrete pad, was $28,500 (and maybe about $1,000 in permit fees added later). The concrete pad was about $10,000 of this cost, so the shed alone was about $18,500.
The actual sales process was easy and the rep had a lot of good ideas of what to do. It did get a little complex with figuring out what kind of floor we would have. We wanted to simply put thick rubber mats down, so we wouldn’t actually need a floor. However, there is room for debate here and we never really got into the research much. The rep simply said we would be fine with a concrete floor and not needing anything else. I’ll talk about this more later, but if all you get to is this post and you’re interested in building a similar gym, here is one important thing to note: put a moisture barrier down before the concrete slab is poured! More on this later.
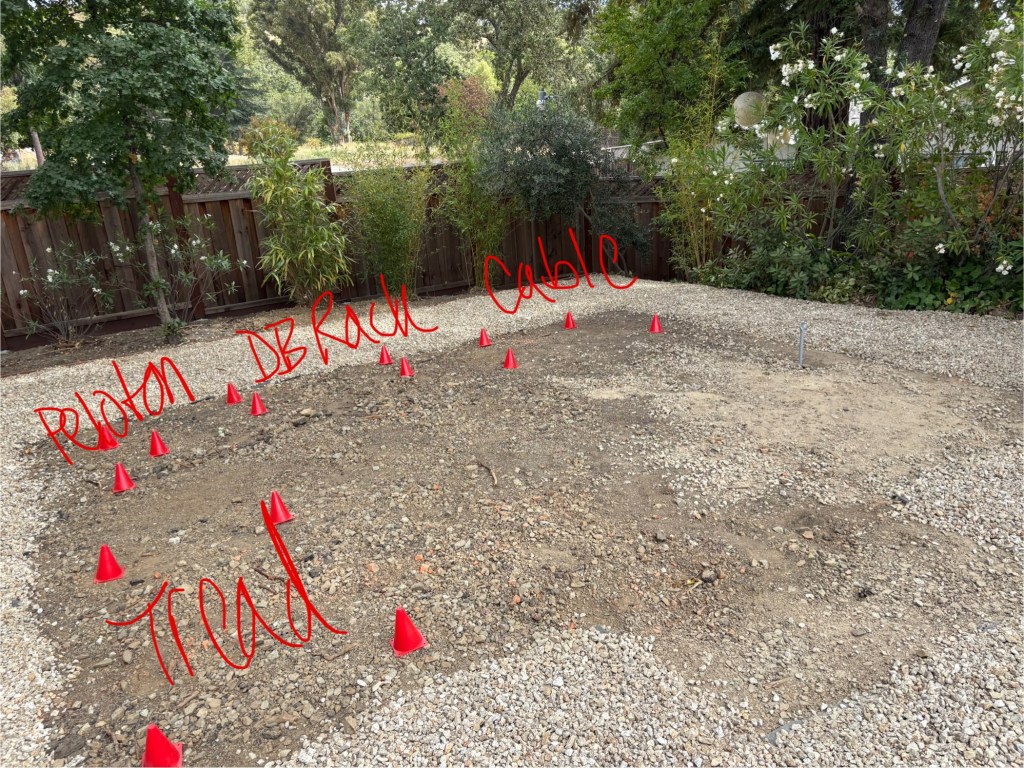
Why did we choose this size TuffShed? It was mostly based on simply how big of a structure could we fit? The cost went up the larger the shed, but the value of the space was huge in our minds. Since it was going to be a gym, bigger is always better in my opinion. You can never have enough floorspace or room for equipment. We figured out the size by using spray chalk, a measuring tape and even sometimes rolling out some gym equipment to see how it fit.
Here were some early thoughts on where things would go and what we could use the space for.
Disclosure: Some links on this blog are Amazon affiliate links for the exact products we bought unless otherwise noted — we may earn a small commission at no extra cost to you.